BuddyRider bike seat for dogs
Setting up your BuddyRider Series 2

1. Check all parts are included.
Remove but do NOT discard the
rubber protective piece on the
mounting deck. This bumper
MUST be re-installed for returns
and is required for a full refund.
Please keep the small adhesive
sound dampening shim for later
use.

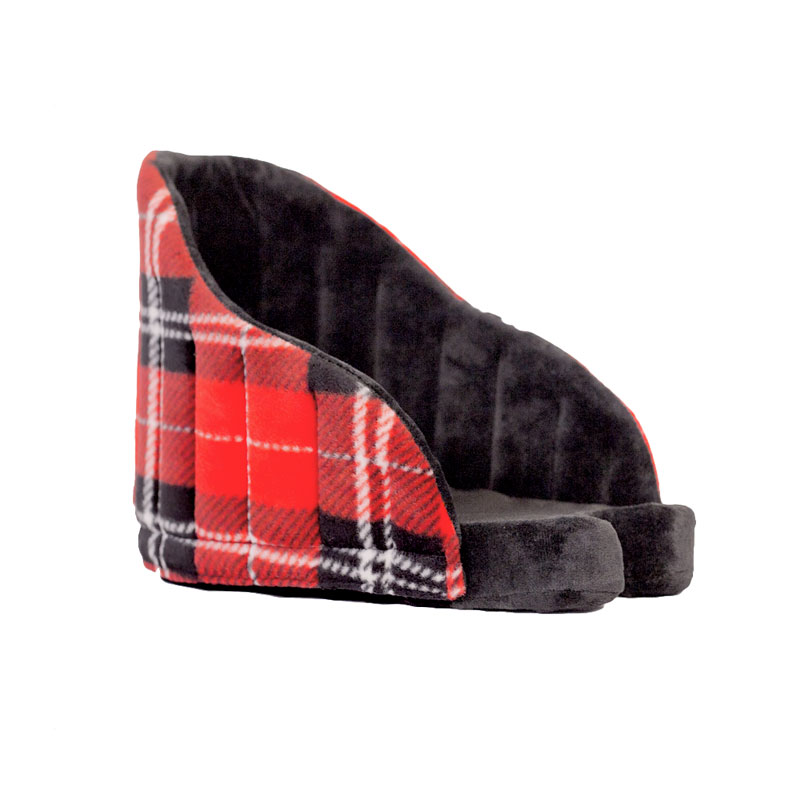
2. Rotate backrest upwards
until it clips to the back of the
bucket. Loosen the knob on the
underside of the paw deck
(counter clockwise.) Adjust
paw deck to desired height. Retighten
knob (clockwise) to
secure the paw deck.

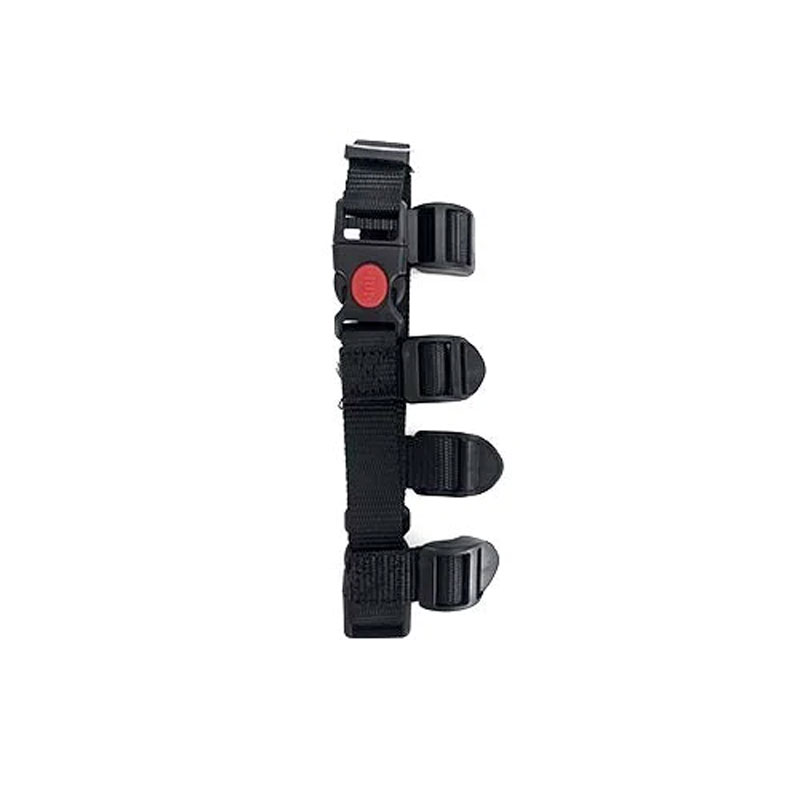
3. Attach the collar to the four tie-down straps as shown. Clips will be in front and behind the neck and connected to the BuddyRider via the straps on the sides. Leave the collar unclipped for now.


5. Attach the receiver to your
bicycle seat post with the open
end facing forward. Position the
receiver as high up the seat
post as possible to maximize
leg room while pedaling. Fasten
to seat post using hardware as
shown.

6. Insert the metal support arm
into the receiver with the flat
plate facing up. Then insert the
quick release pin with the spring
rattle tensioner on it through
the hole in the receiver. Insert
“R” clip through the small hole in
the quick release pin.

7. Position the pet seat on the
arm as far forward as possible
without interferring with your
handlebars or steering.

8. Remove the padding on the
bottom of the pet seat to
expose the mounting holes. Line
up 4 of the mounting holes with
the holes in the metal plate on
the support arm. Place a nut in
each nut-well and fasten the
metal plate using the 4 screws
provided. Re-install padding.

9. With the collar attached to
the Buddyrider, place your pet
in the seat, connect the two
clips and adjust the collar as
needed.

10. Before your first ride, place
your buddy in the seat while it is
attached to your bike and try
walking your bike first. Praise
your pet and reward them with
a treat.
11. You’re ready to ride! Hop on
your bike and ride slowly for
short distances working your
way up to longer rides once
your buddy is used to their
Buddyrider. Double check that
all screws are securely fastened
before each ride.

12. Do not discard your
adhesive shim! If after riding
you feel the need to dampen
the movement and sound of the
metal support arm within the
receiver, apply the adhesive
shim to the underside of the top
of the receiver as shown.